
Two possible options:
Option 1:
Add an end date for access rights that corresponds to the end date of the package; this will suspend access, but the learner will remain visible in all reporting data (simply retrieve an amendment file and add an access start date and end date to the learner accounts):
Access the import service
From your ENI Portal administration console, click on the icon 

A window will open to guide you through:
- Creating users
- Editing users
Explanations are provided to help you with your imports
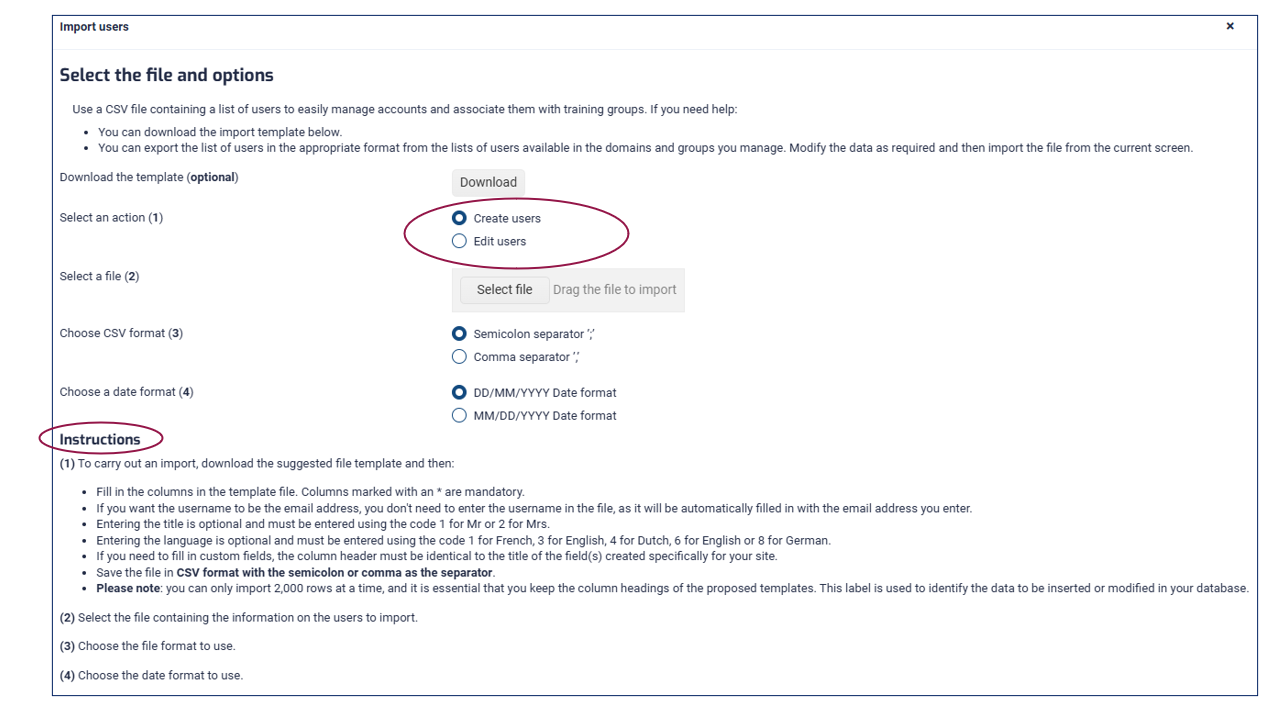
Creating users by import
Creating the import file
- Download the template to create users available in the import window
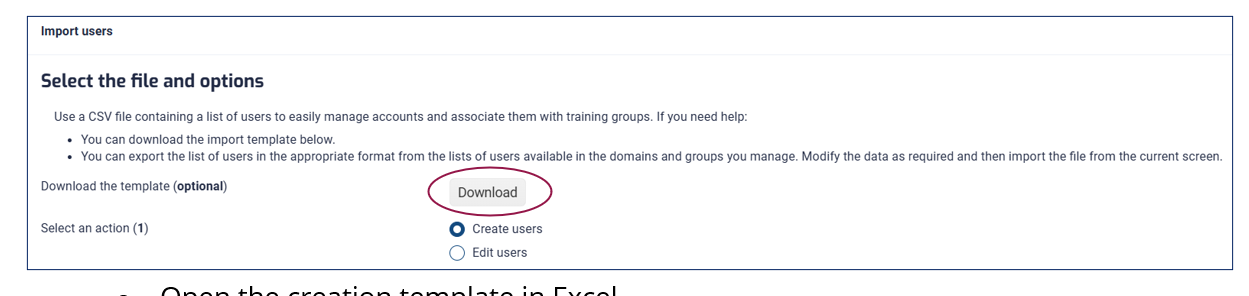
- Open the creation template in Excel
- Fill in the various columns (see appendices "Rules for filling in import files" for more detail)
Columns marked with an asterisk are mandatory
- Identifier*
- First name
- Name
Other columns can be deleted if not needed.

- Choose between the "Username" or "Email" column to generate your users' Usernames
If only the email is filled in, then the user’s email will be the default Username.
If both the email address and the username are filled in, the username will be selected by default.
- In Excel, export the file to the correct format: "File"; "Save as"; "CSV UTF-8 (comma delimited) (*.csv)".
- Limit: you can only import 2,000 rows at a time
Note: the file must be in .csv UTF8 format (delimited by commas). Files in CSV format (separator: semicolon) will also work, but CSV (Macintosh) or CSV (DOS) formats are not supported.
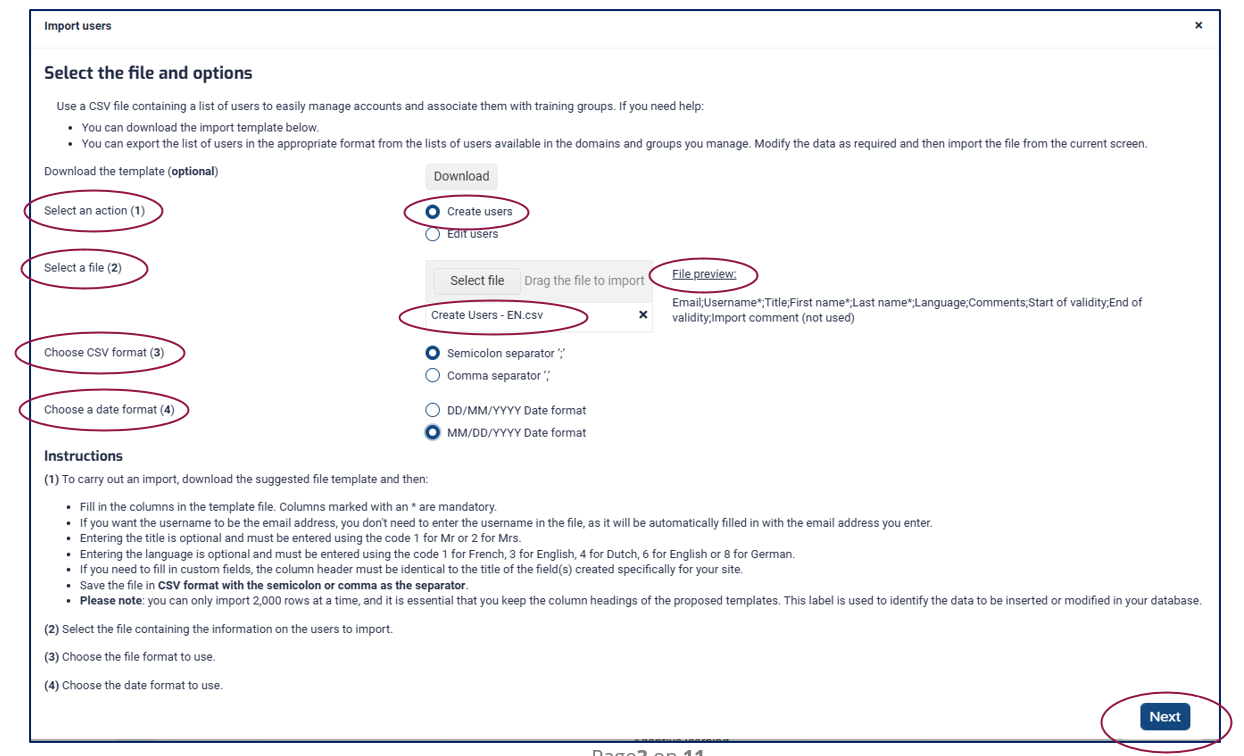
Select the file and the "Create users" option
- In the import window, select the "Create users" action
- Select the previously prepared file
- Select your file format separar
- Semicolon separator "; ".
- Separator ", "
Once the file has been selected, a preview of the first line shows the file format and confirms which separator was generated by Excel when you saved it.
- Select the date format used in the .csv file
- DD/MM/YYYY
- MM/DD/YYYY
NB: Date and time format is not permitted, only the date format is supported.
- Click on the "Next" button
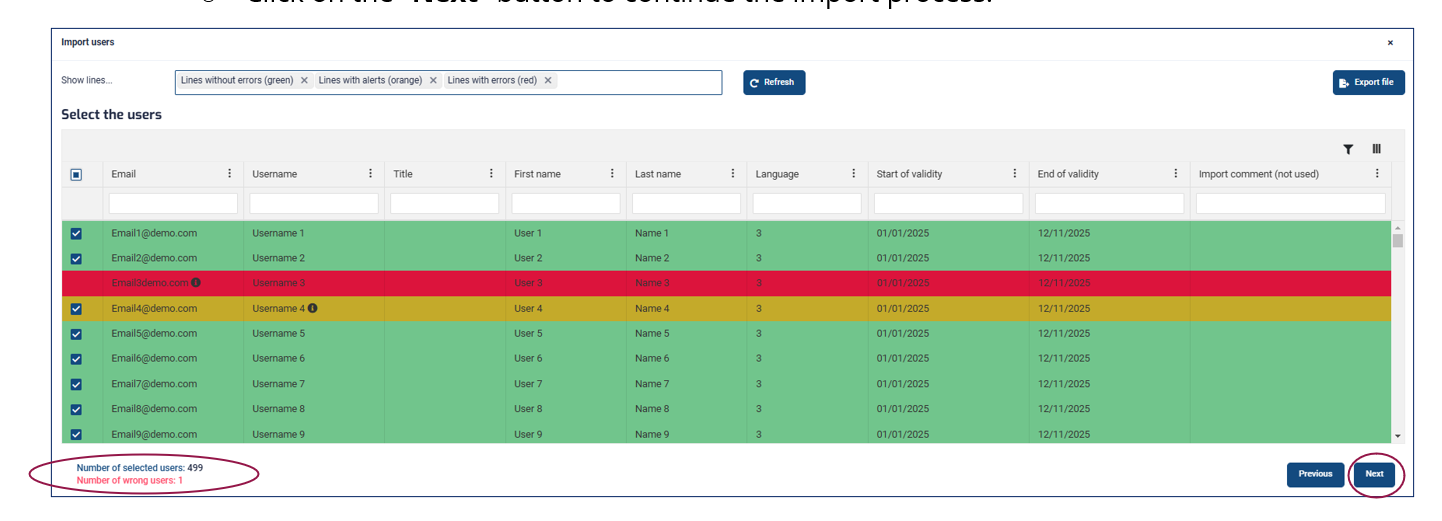
Selecting users to create
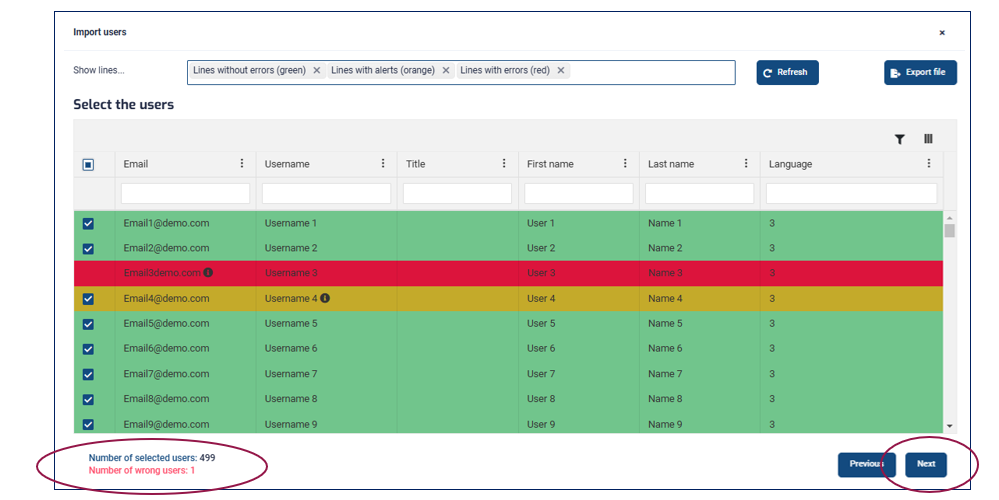
- In the user selection screen, each cell in the table can be clicked on and edited in order to:
- Correct lines with errors reported by the import tool (in red)
- Edit certain values if necessary
The colour code used identifies whether the line can be imported or not
- Green: no functional error identified on the line
- Orange: The line has at least one non-blocking error for import.
- Red: The line contains an error and cannot be imported without a correction.


Each cell in the error or alert table has an information icon explaining the problem when you hover over it.
NB: If more than 5 lines come back in error (red), it is preferable to make the necessary corrections in your Excel file and then re-import it.
- Tick the lines to be imported.
- Click on the "Next" button to continue the import process.
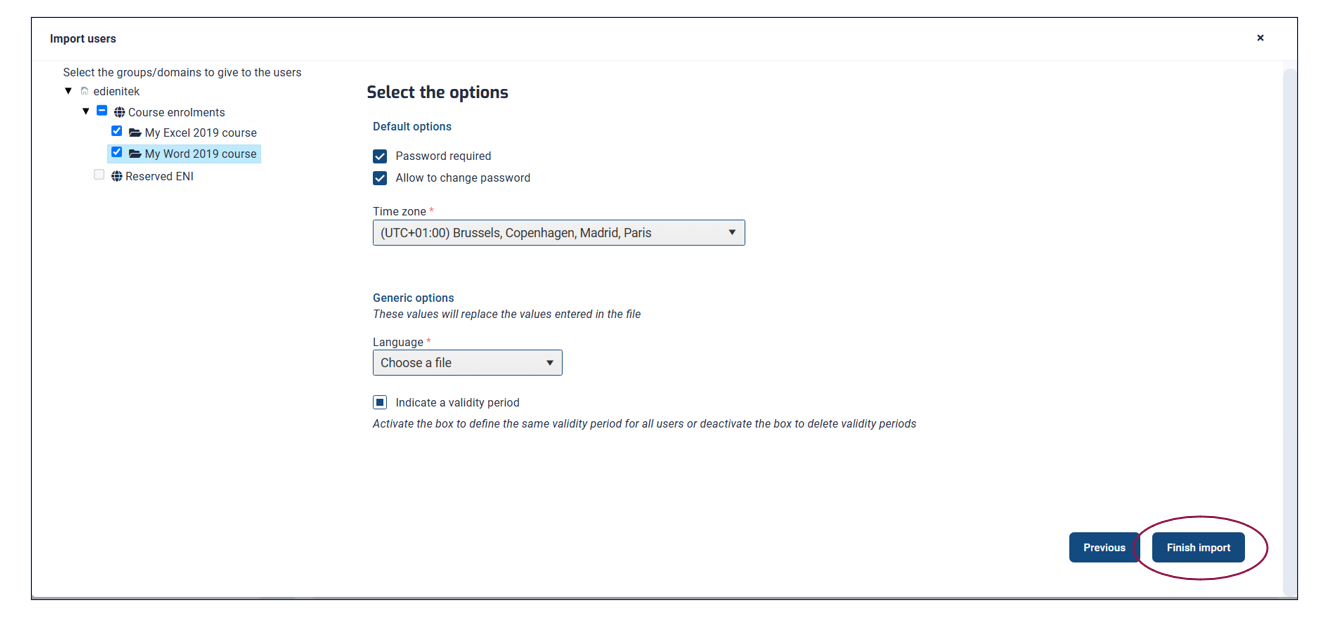
On the domain and user options selection screen:
- Select the domain in which users are to be created.
- Select the group(s) or new group(s) to which users are to be enrolled.
- Define user options on the right of the screen
The selection made will be applied to all users, with priority given to the data in the file.
- Click on "Finish import" to complete the import process
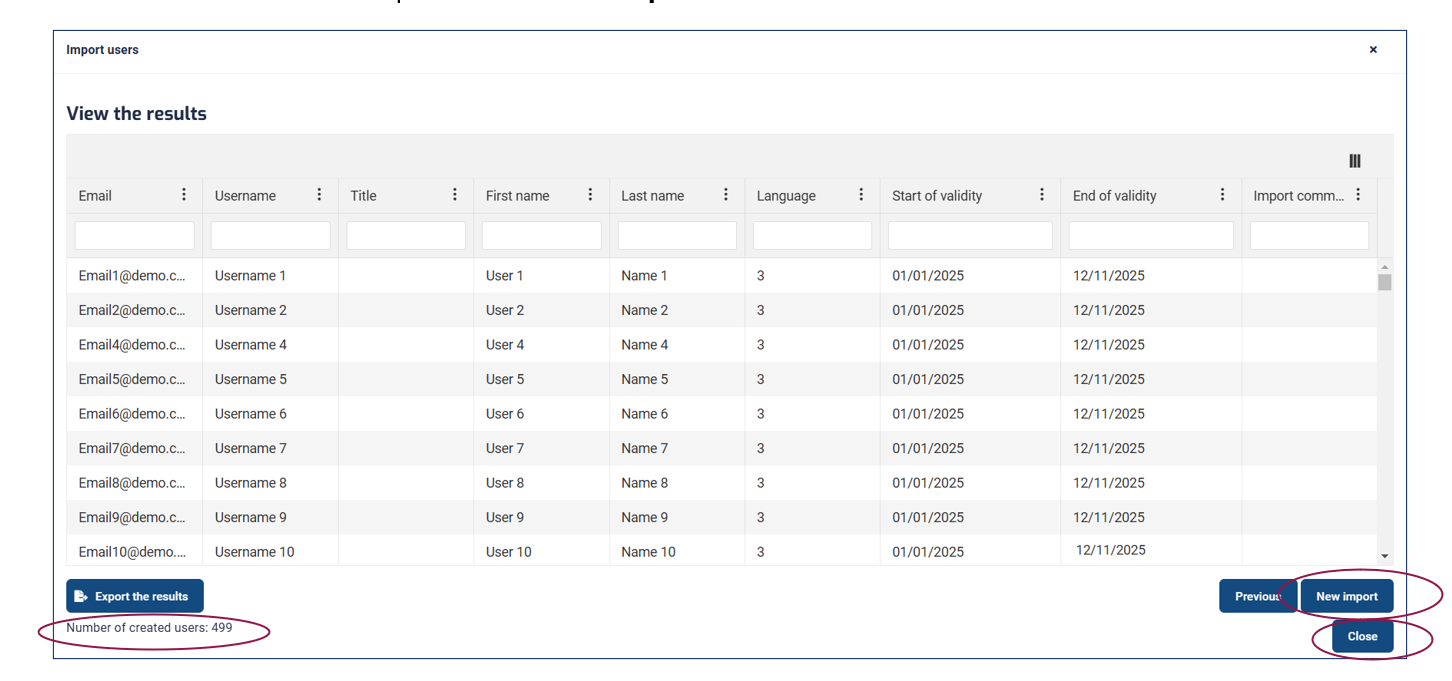
- A window will show you the detailed results of your import.
- You will then be able to choose from a range of buttons, such as "Close" to close the window or perform a "New Import".
Editing users by import
Preparing the “Edit users” file
- Select the domain in which you have users to edit.
NB: It is only possible to deal with one domain at a time.
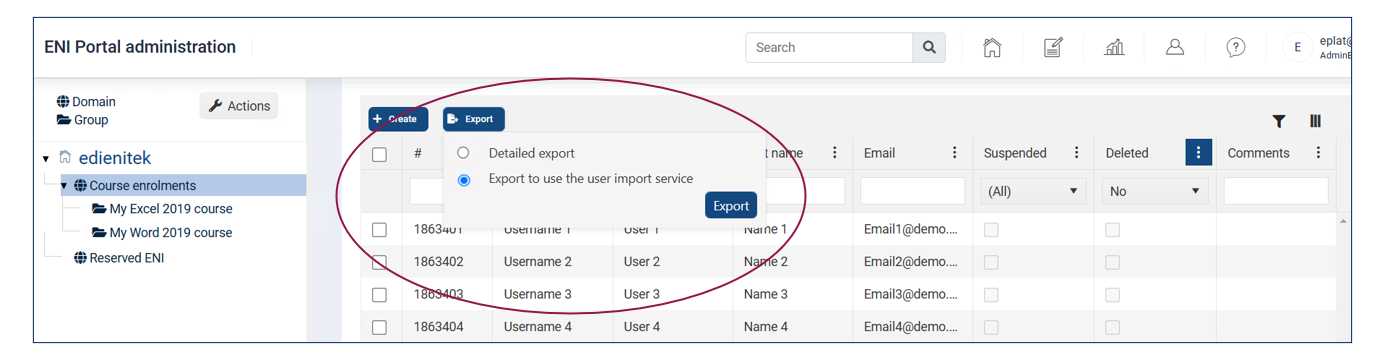
- Go to the List of users in the domain and click on "Export", then "Export for user import service".
NB: click on the "Export" button again to make the selection menu disappear.
- Open the exported file in Excel.
- Keep only the rows and columns you wish to edit.
- Choose between the "Username" or "#" column (ENI user reference) to reconcile the users to be edited.
If both columns are filled in, the "#" column will be used for reconciliation.
- Modify the required data (see appendices "Rules for filling in import files" for more detail).
- In Excel, export the file to the correct format: "File"; "Save as"; "CSV UTF-8 (comma delimited) (*.csv)".
- Limit: you can only edit 2000 lines at a time
Please note that the file must be in .csv UTF8 format (delimited by commas). Files in CSV format (separator: semicolon) will also work, but CSV (Macintosh) or CSV (DOS) formats are not supported.
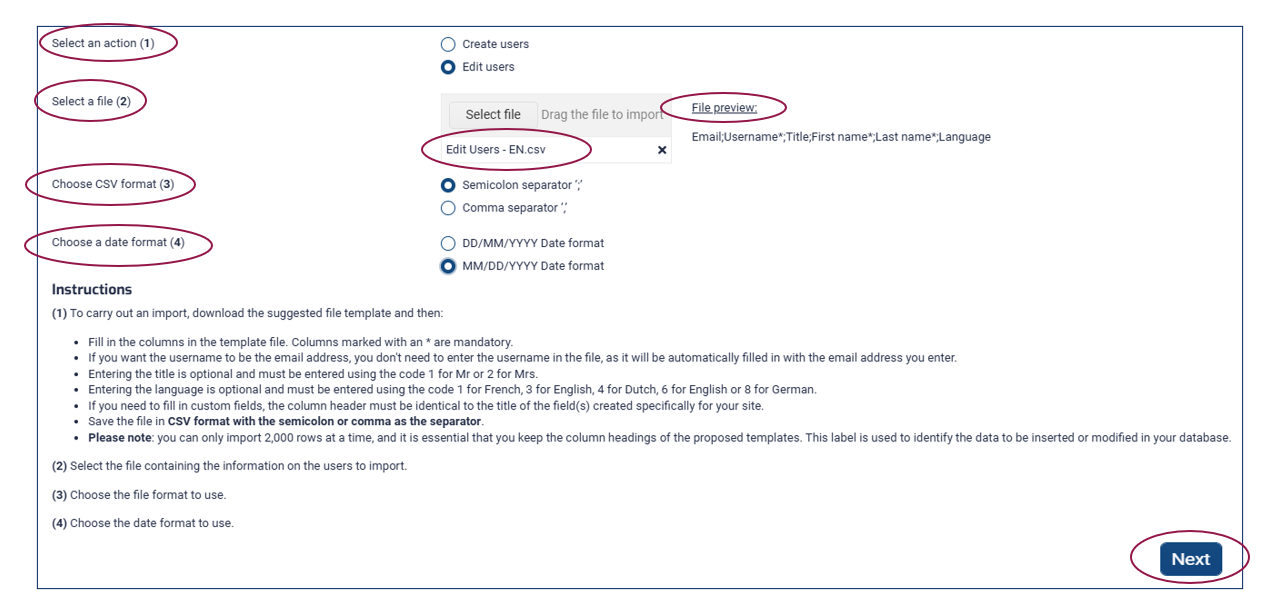
Selecting the file and the "Edit users" option
- In the import window, select "Edit users"
- Select the previously prepared file
- Select your file format
- Semicolon separator "; ".
- Separator ", "
Once the file has been selected, a preview of the first line shows the file format and confirms which separator was generated by Excel when you saved.
- Select the date format used in the .csv file
- DD/MM/YYYY
- MM/DD/YYYY
NB: Date and time format is not permitted, only date format is supported.
- Click on the "Next" button
Select the users to edit
- In the user selection screen, each cell in the table can be clicked on and modified in order to:
- Correct lines with errors reported by the import tool (in red)
- Edit certain values if necessary (e.g. user email here)
- Please note: the Username, first name and last name of learners who have already logged on to their learning environment cannot be changed.
The colour code used identifies whether the line can be imported or not
- Green: no functional error identified on the line
- Orange: The line has at least one non-blocking error for import.
- Red: The line contains an error and cannot be imported if not corrected.


Each cell in the error or alert table has an information icon detailing the problem when you hover over it.
- Tick the lines to be imported for editing
- Click on the "Next" button to continue the import process.
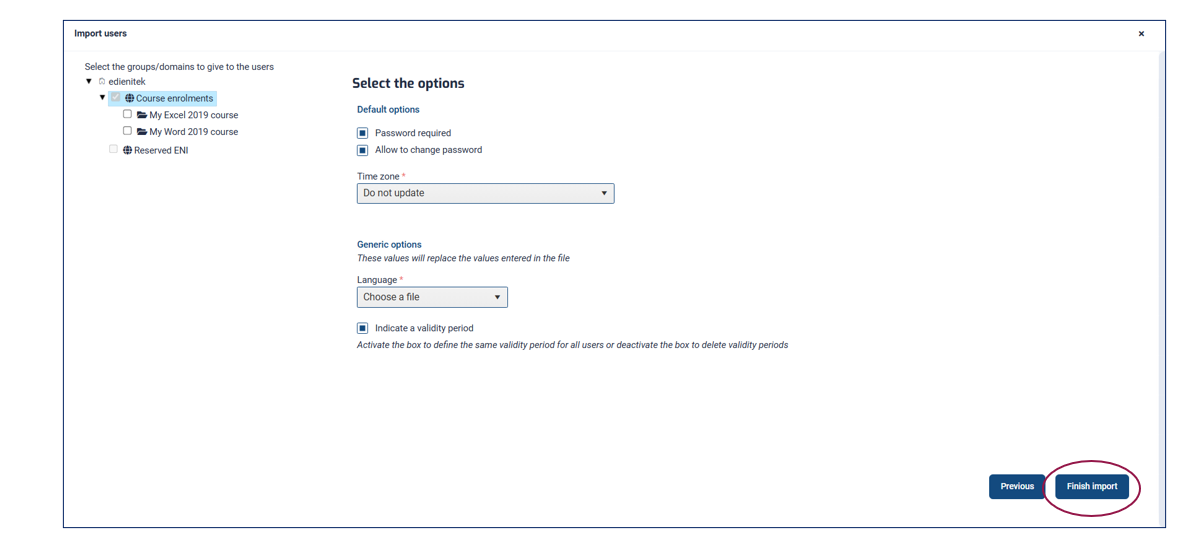
Selecting domains and user options
- In the selection screen for domains and user options:
- Domain selection in edit mode is automatic
- Select the group(s) or new group(s) to which users are to be enrolled.
NB: If no group is selected, only the learner information will be edited and no additional enrollments will be made in a group.
- Define user options on the right of the screen
The selection made will be applied to all users, with priority given to the data in the file.
Tick boxes in an "intermediate" state allow data not to be updated (e.g. “password required” or the “validity period”).
- Click on "Finish import" to complete the import process.
A window will then show you detailed results of your import
You will then be able to choose from the various buttons available, "Close" in order to close the window or proceed with a "New import".
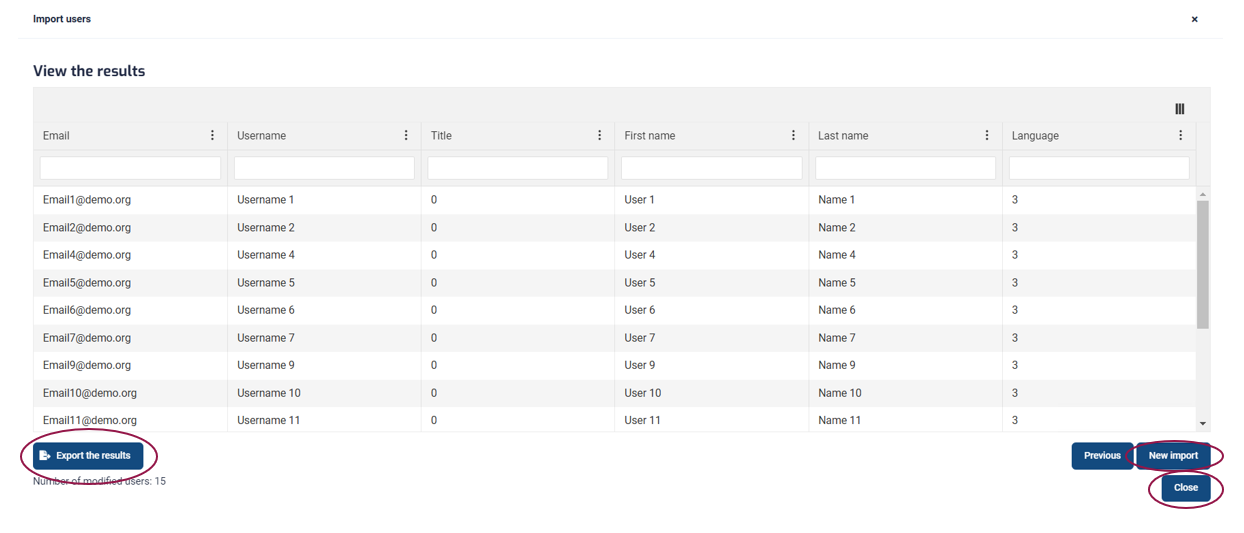
Use the Previous button to return to the user selection screen: the changes made to the screen the first-time round are retained, and users who have already been imported no longer appear.
This makes it easier to process the same file several times.

All that's left to do is the final phase (choosing the domain/group and selecting the options).
The New import button takes you back to the first import start-up screen, where you can choose a file to import.
Appendices
Rules for filling in import files
Column | Data | Comment | Format |
1 | # | ENI identifier In creation: will be created once the import has been completed For edition: # or username If both the # and the username are filled in, the # will be given priority. | Digital |
2 | To create: username or email *required If only the email is filled in, it will be the default username. | Regex text: . + @.+..+. | |
3 | Username | To create: username or email *required For edition: # or identifier *mandatory If both the # and the username are entered, the # will be given priority. Cannot be edited if the user has already logged on to their learning environment |
|
4 | Title | 1 = Mr 2 = Mrs Empty or 0 = empty field | Empty, 0, 1 or 2 |
5 | First name | In creation: *Mandatory For edition: cannot be edited if the user has already logged on to their learning environment | Free text |
6 | Last Name | In creation: *Mandatory For edition: cannot be edited if the user has already logged on to their learning environment | Free text |
7 | Language | 1 or empty = FR 3 = EN 4 = NL 6 = ES 8 = DE | Empty, 1, 3, 4, 6 or 8 |
8 | Comments | Visible on the user's "Properties" page | Free text |
9 | Start of validity | Access granted on the date and time of day D at 00:00:00 | Depending on selection: DD/MM/YYYY or MM/DD/YYYY |
10 | End of validity | End of access on the date and time of day D at 23:59:59 | Depending on selection: DD/MM/YYYY or MM/DD/YYYY |
11 | Import comment (not used) | Only visible in the selection window when importing users (importing aid) |
|
12 | Custom fields | Depending on customer settings |
|
The user selection screen
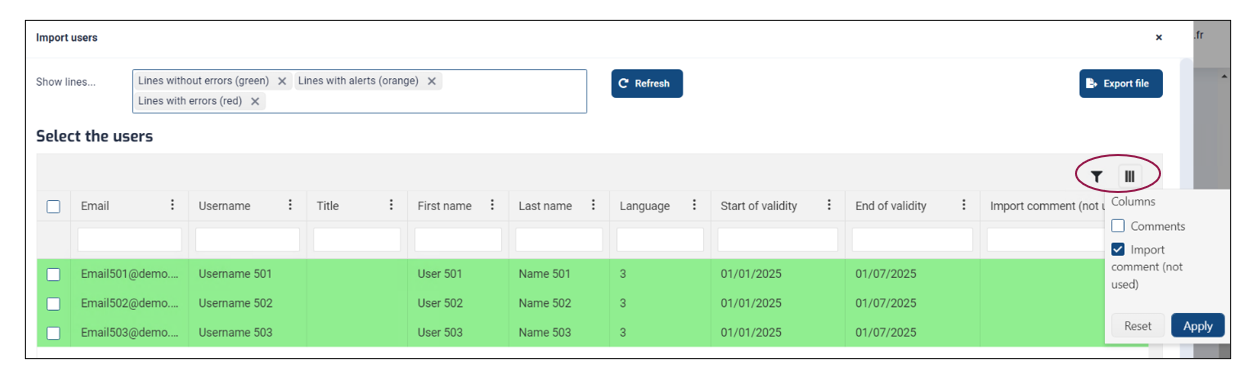
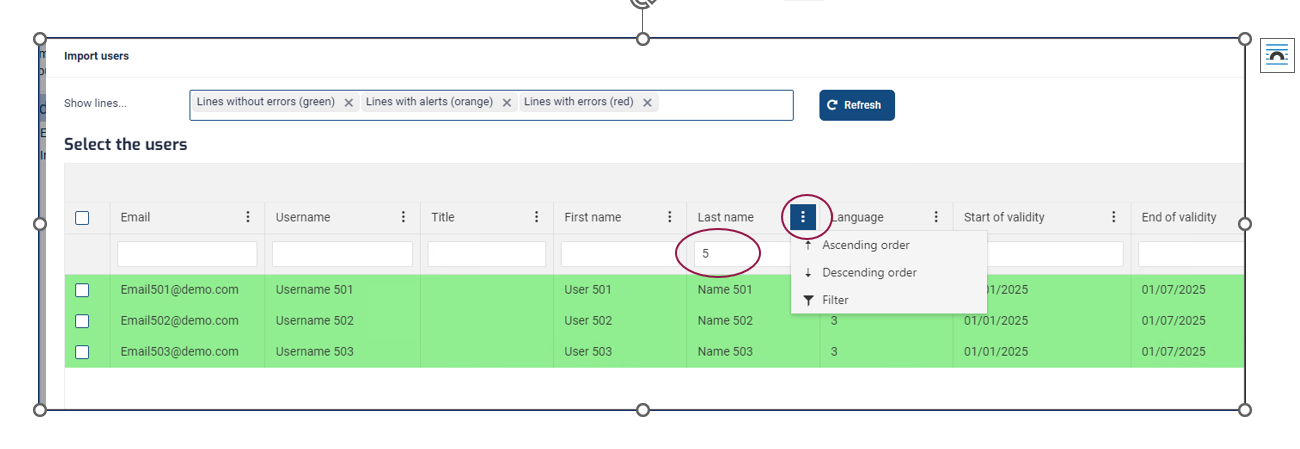
The "Refresh" button is used to refresh the chosen filters according to the fields corrected or edited on the screen (Rows without errors - green, Rows with alerts - orange or Rows with errors - red) as well as the filters and sorts applied to the columns.
Click on the cross to remove filters if necessary.
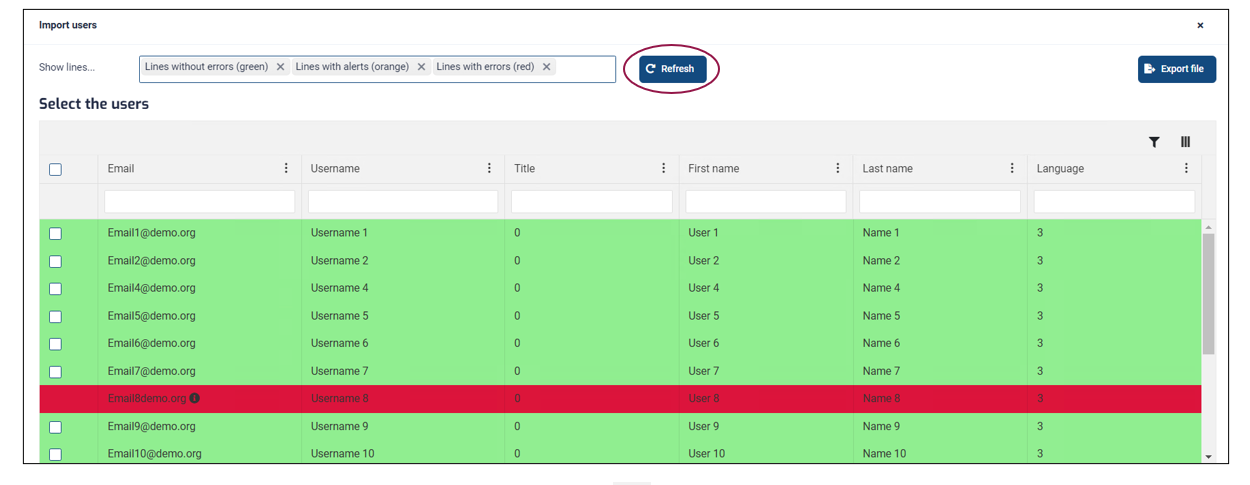
You can display additional columns using the button 
Or filter on certain items using the dedicated fields or the button 
Specific administration rights
A Super Administrator is not restricted in terms of creating or editing users.
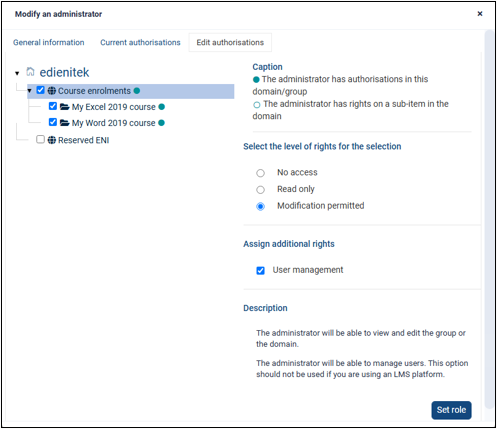
A Standard Administrator can only create or edit users if he/she has "Modification permitted" and "User management" rights for a given domain. They will only have access to learners in the domain to which they have rights.
NB: Assigning rights to a group alone is not enough to give a Standard Administrator the rights to create and edit users.
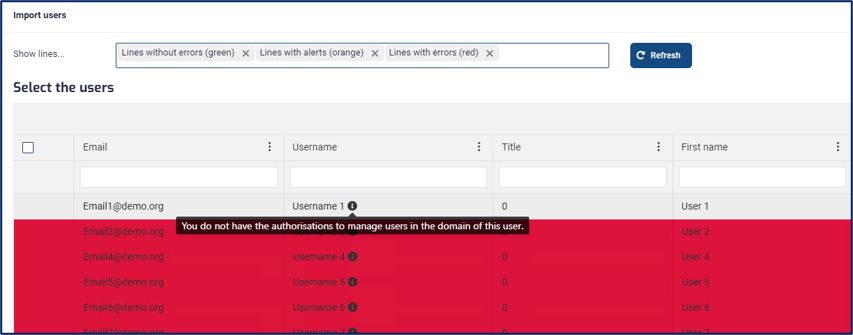
If a Standard Administrator tries to edit a user to which he or she does not have rights, the line will be highlighted in red and an alert will appear on the user selection table.
Option 2 :
Delete the accounts; in this case, you will no longer see these users in the e-learning overview, but you will still be able to retrieve their login records: The User import service
Preamble
Properly deleting a user requires to unsubscribe them first from the groups to which they have been enrolled.
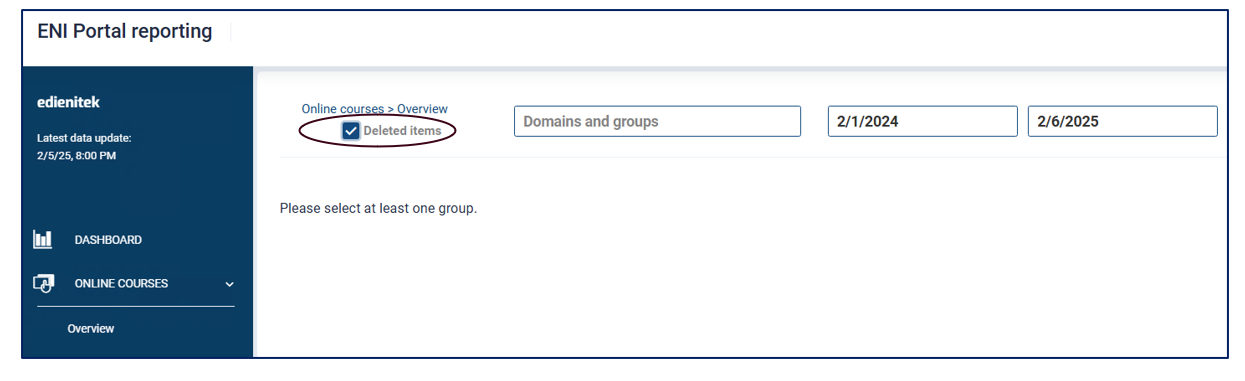
Once deleted, the user will only be visible in the reporting space by ticking the box that allows "deleted items" to be viewed in the various reports available.
To date, the buttons to Restore or Reactivate a user account will have the same effect when accessed by Super Administrators or Standard Administrators. We are currently working on the management of administrator rights to differentiate the operations behind these two buttons.
Deleting a user account via the user properties
- Select your user using the top search bar or by clicking on the domain they are enrolled in and accessing the List of users.
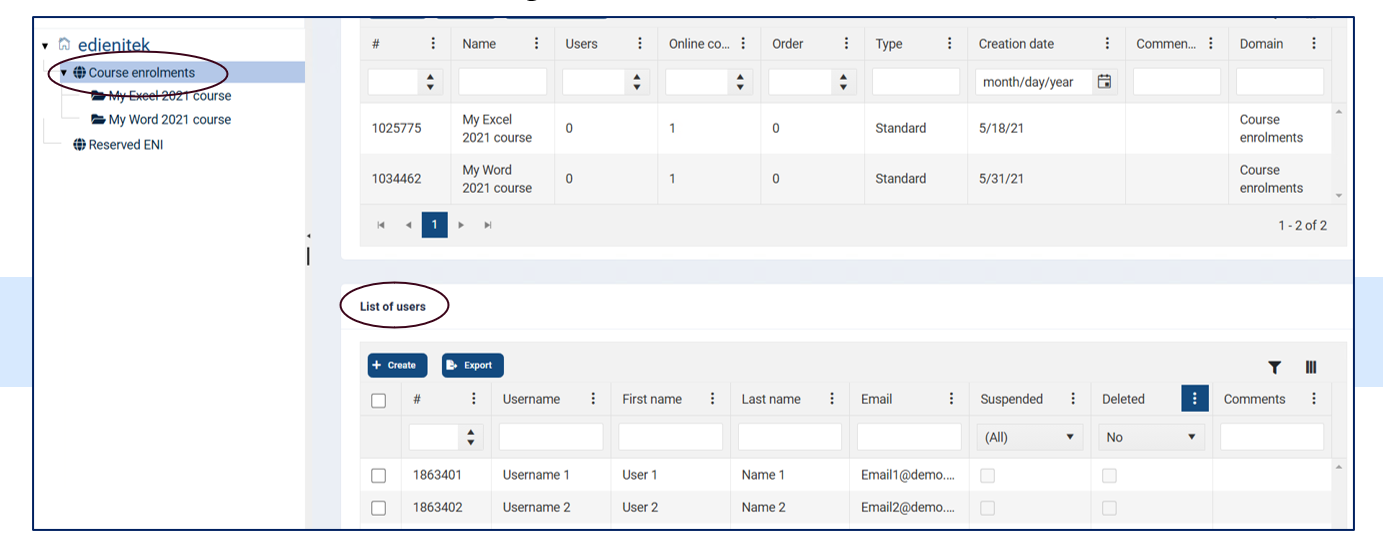
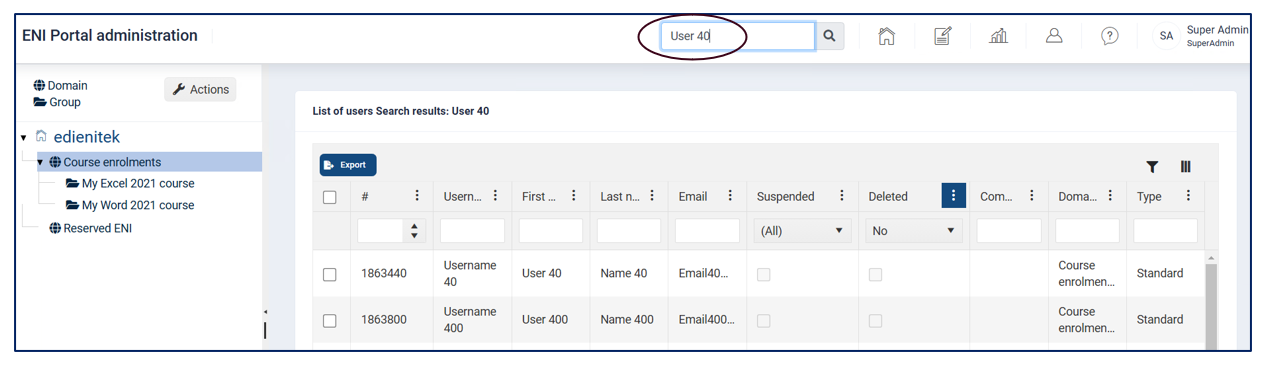
- Select the user to delete and click on Properties

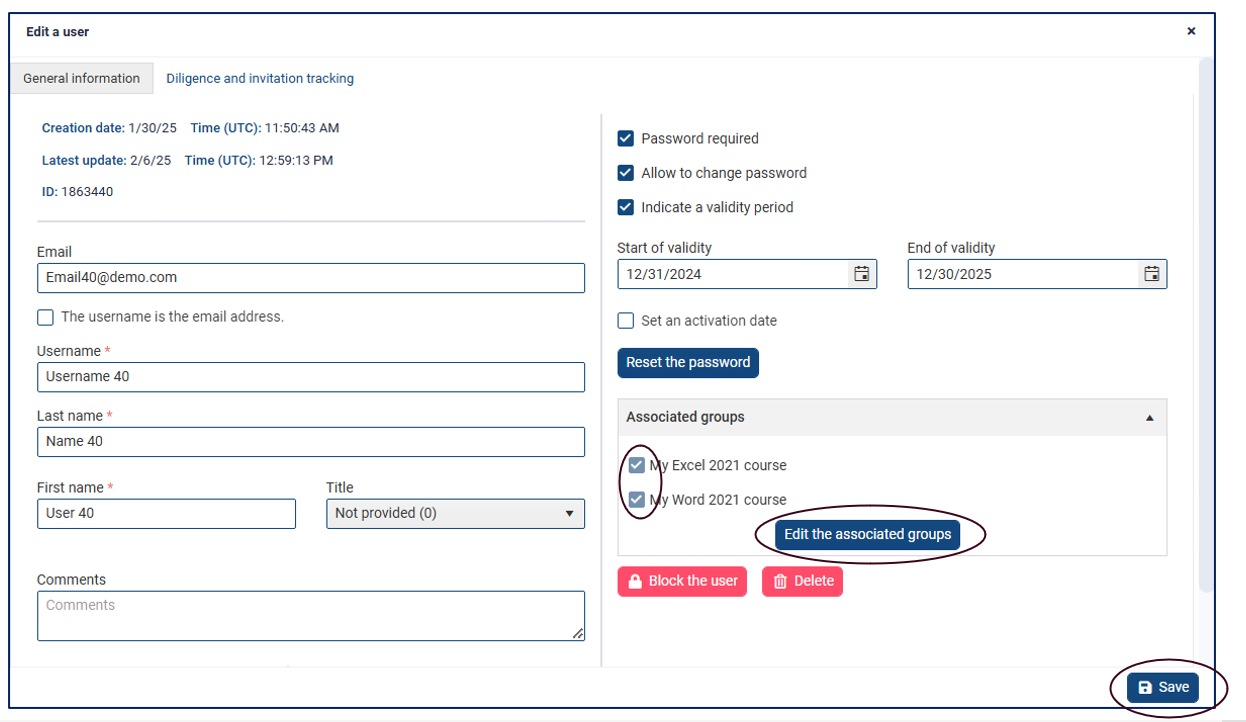
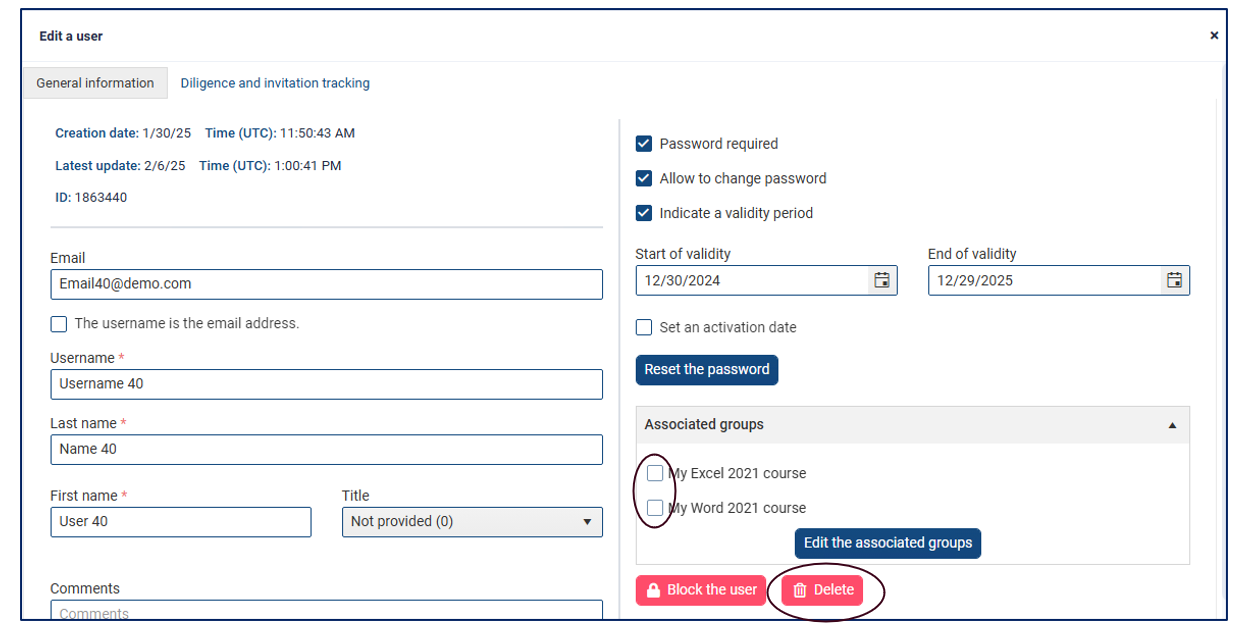
At the bottom right of the user properties, click on the Edit the associated groups and untick the groups in which the user was enrolled, then click on the Save button.
Then click on the Delete button to cleanly delete your user from your database.
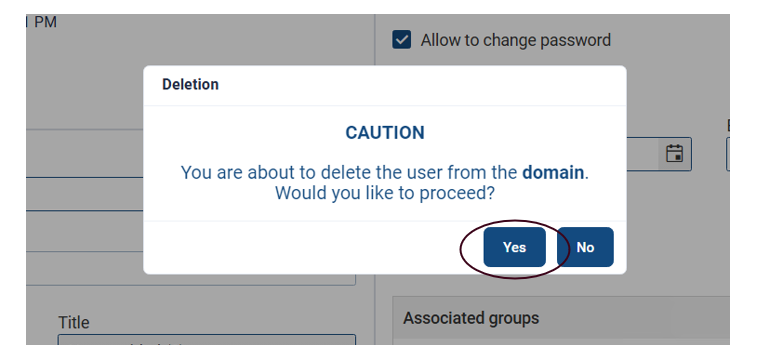
A popup window will be displayed to confirm or reject the operation. To proceed with the deletion, click Yes.
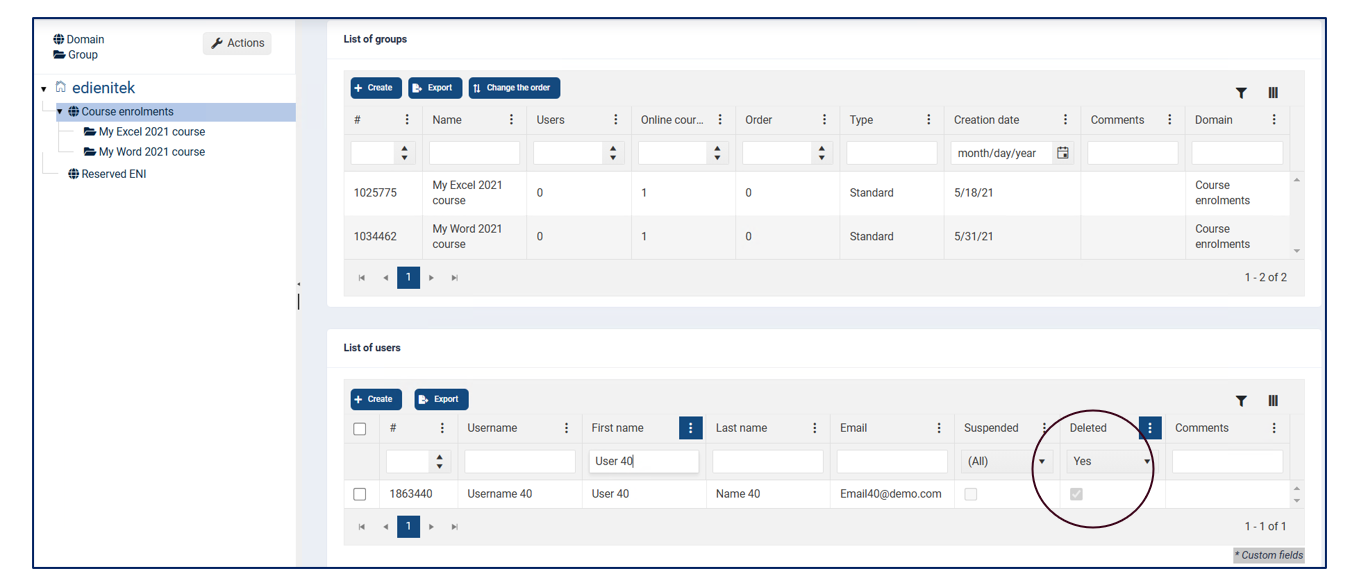
The user account has now been deleted. The user will no longer have access to the ENI portal.
Deleting multiple user accounts
Removing users from their groups
- Remove users to be deleted from all the groups in which they have been enrolled.
- Select a group and click on Enrol users
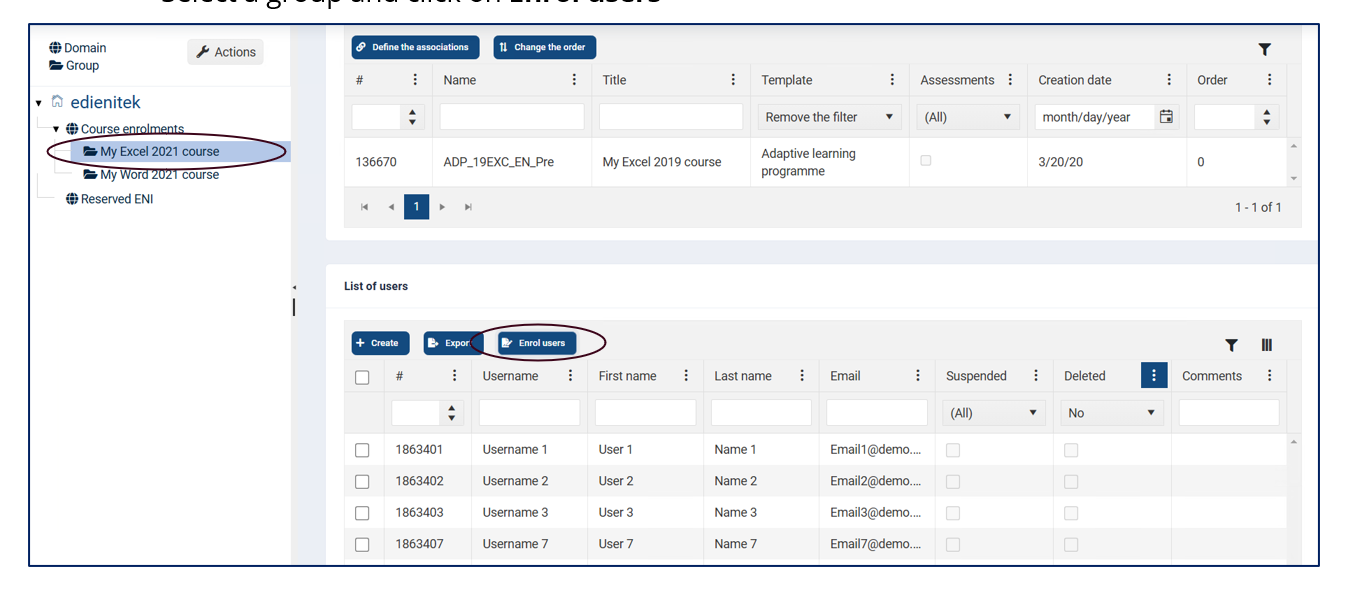
In the right-hand window, tick the users you wish to remove for deletion.
NB: It is possible to select multiple users at once by clicking along the line of the first user to remove and holding down the 'shift' key on your keyboard, then selecting the line of the last user to remove and clicking right next to the tick box.
Click Remove and then Save.
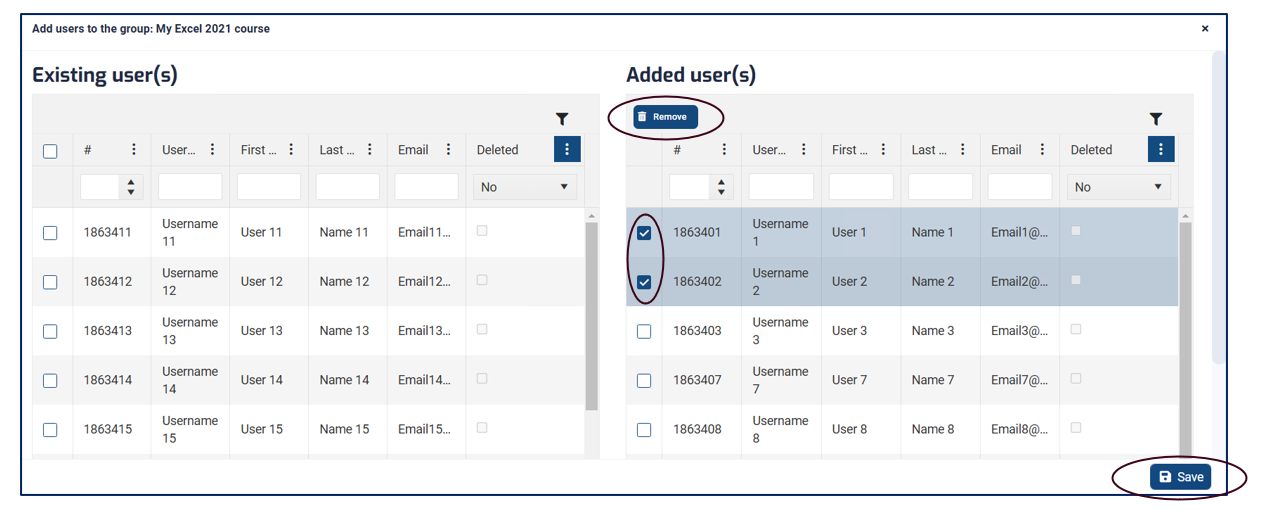
Deleting users from their domain
- Select the domain in which the users to delete are enrolled and scroll down to the List of users table.
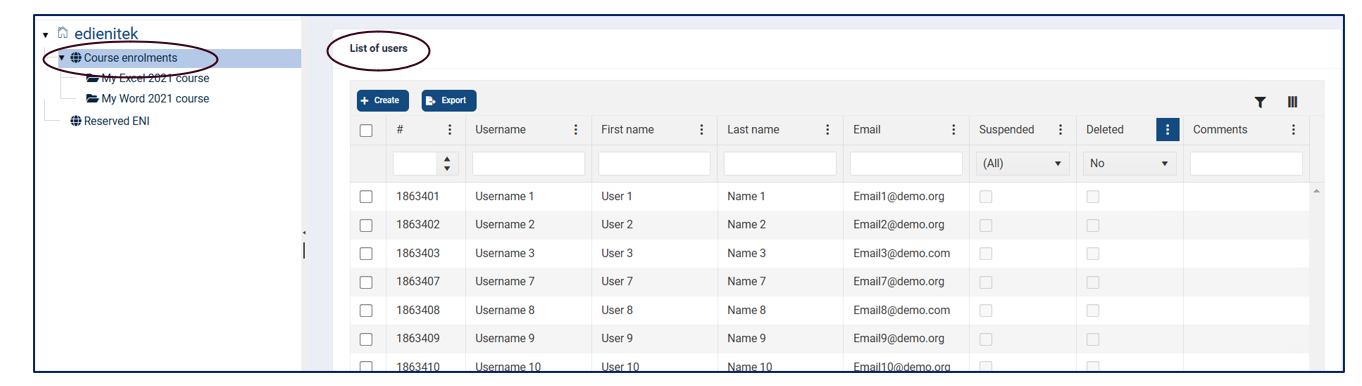
Select the users to delete and click on Delete
A tick box at the top left corner of the table also allows you to select all the users in the domain with a single click.
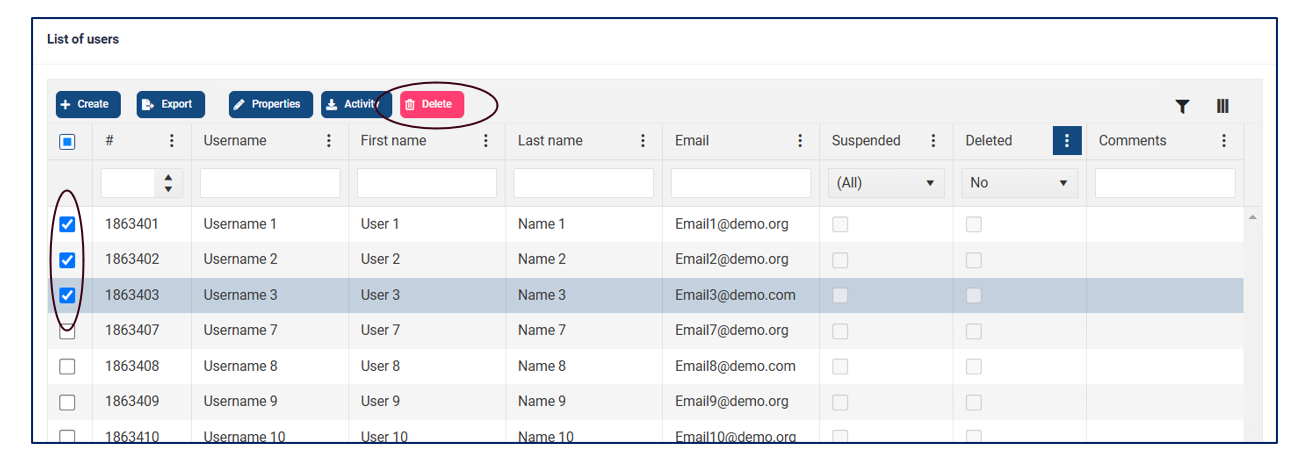
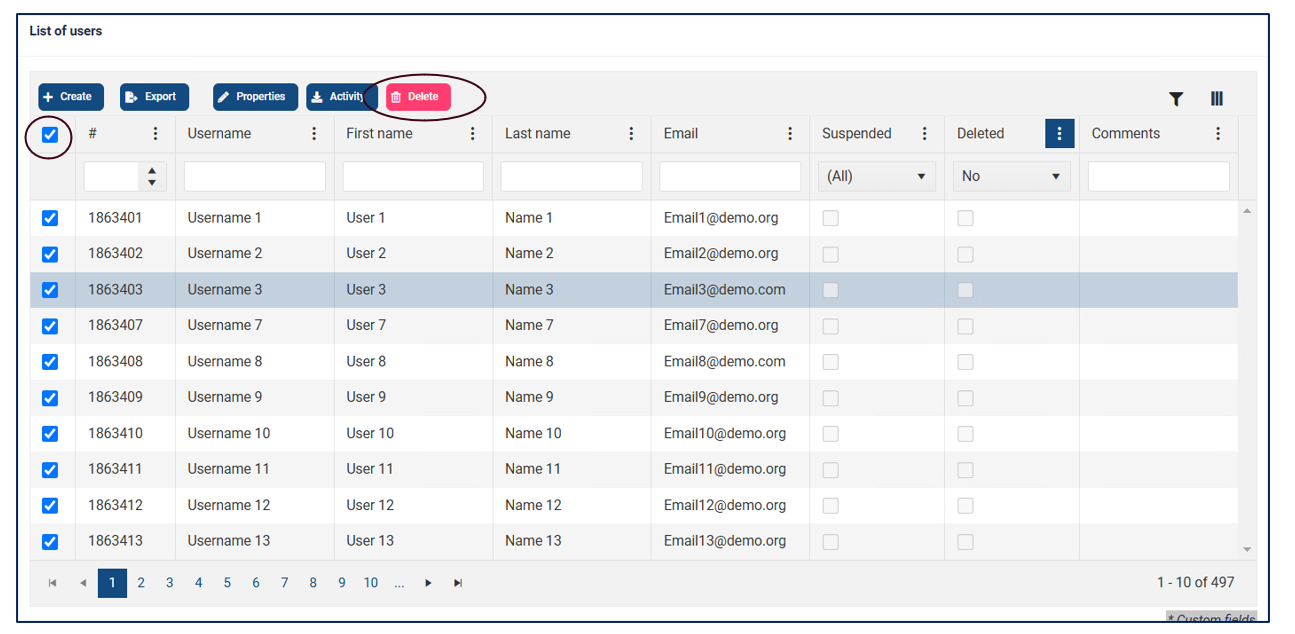
A popup window will be displayed to confirm or reject the operation. To proceed with the deletion, click Yes.
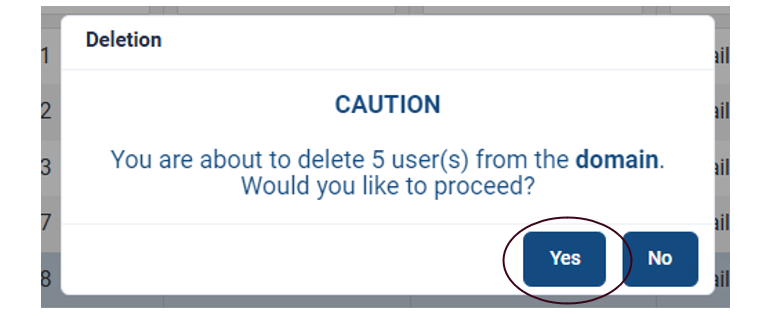
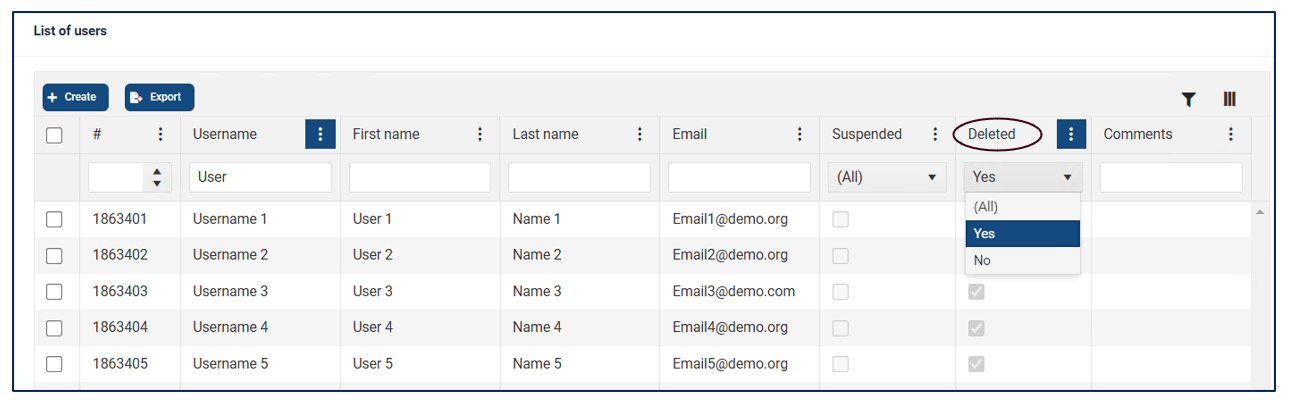
Unless the domain is subsequently deleted, user accounts will remain visible by going to the domain to which they belonged and consulting the List of users table.
In the "Deleted" column, filter the items by selecting "Yes".
Reactivating a user account
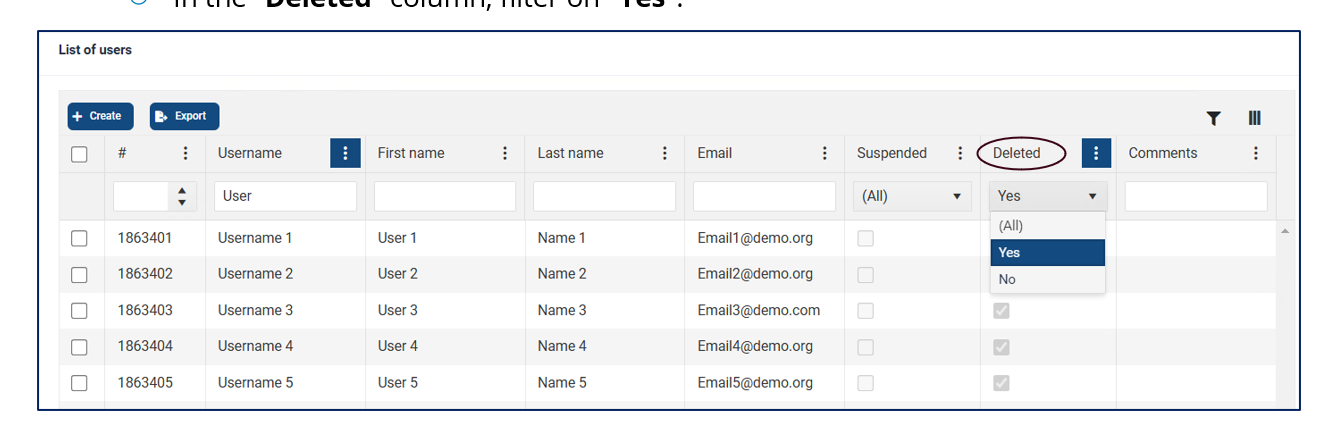
- Select the domain in which the deleted user was enrolled and scroll down to the List of users table
- In the "Deleted" column, filter on "Yes".
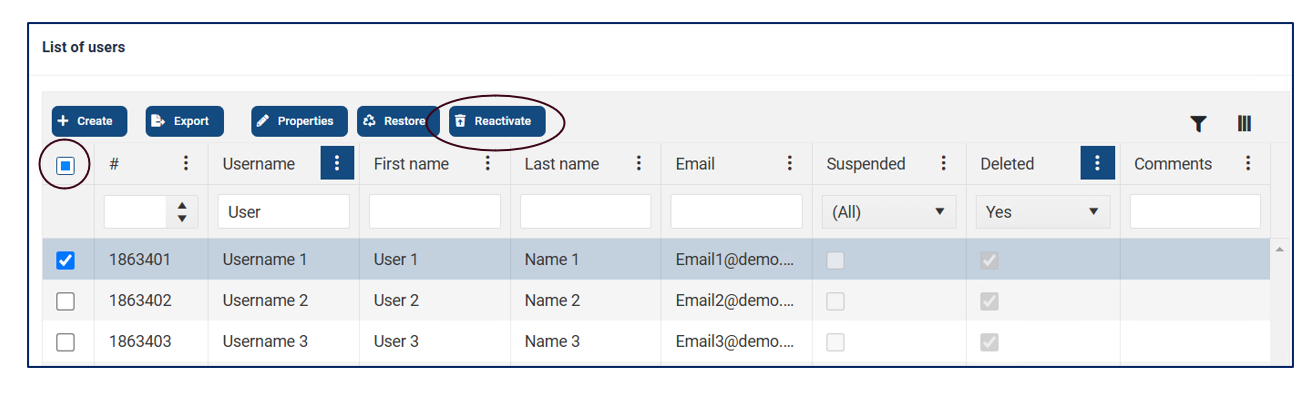
Select the user to reactivate and click on Reactivate;
Multiple selection is also possible, if desired, using the tick at the top left of the table.
A popup window will be displayed to confirm or reject the operation. To proceed, click Yes.
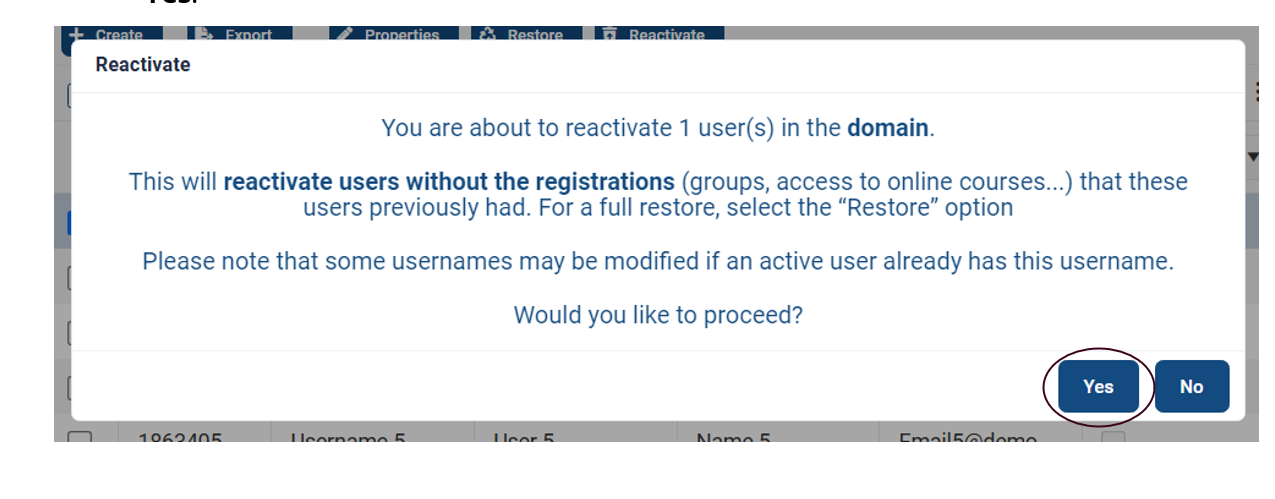
If the user you wish to reactivate has the same username as that of another active user, a pop-up window will suggest a new default username. You can be change it if necessary, by typing the username of your choice in the field provided.
Once you have entered the new identifier, click Yes to confirm the operation.
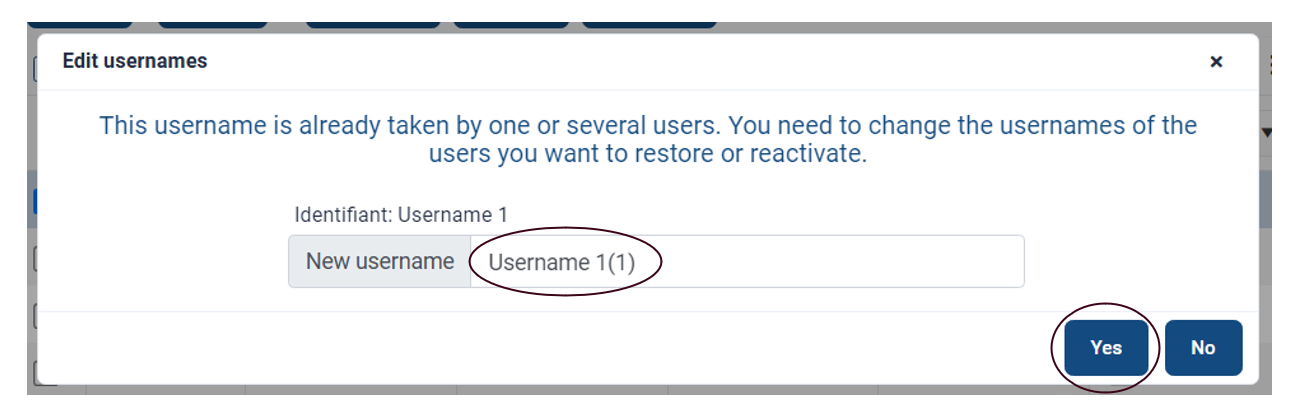
If you have selected multiple accounts to reactivate and more than 5 of them are already taken by active users, you will not be able to proceed and shall have to make the necessary changes on an account-by-account basis.