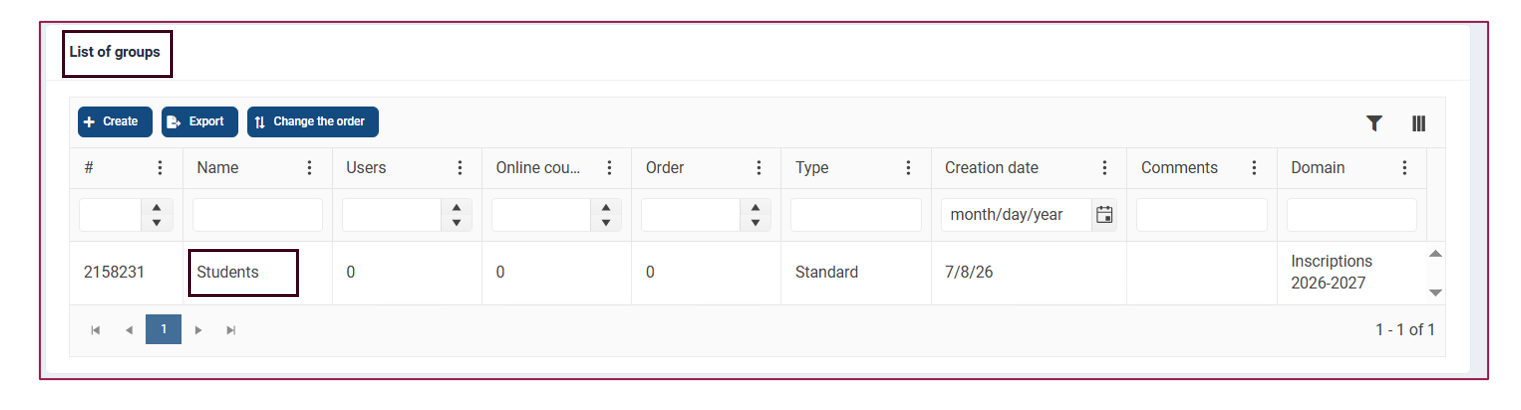
Each administration console contains at least one domain. A domain is the top level of your training portal structure. It allows you to organise your user groups and manage enrolment in online courses more efficiently.
What is a domain used for?
We recommend creating a new domain when you want to:
- Identify a specific audience (for example, a campus, subsidiary, cohort, or department).
- Separate different projects (for example, by year, country, geographical location, or administrative entity).
- Restrict administration rights to specific administrators.
Good to know
A domain must contain at least one group.
Groups are created within domains. You then associate online courses with these groups and enrol users in them.
Please note: A user can belong to only one domain. If the same user needs to exist in two different domains, a second user account with a different username must be created.
Creating a Domain
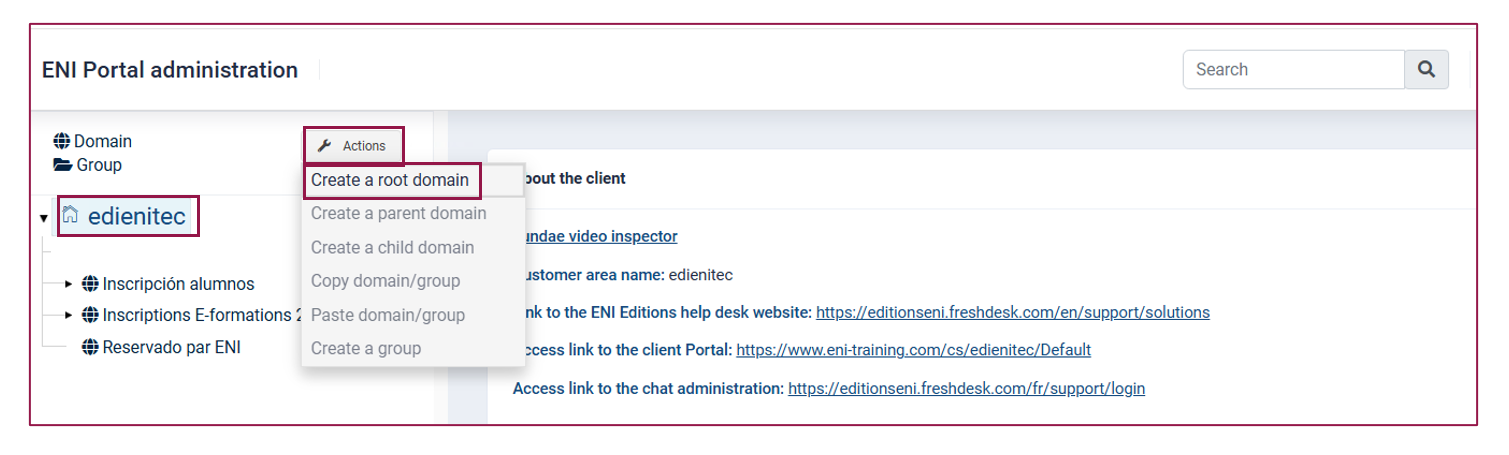
In the portal tree structure, domains are identified by the globe icon.
To create a domain, select your site name (on the left-hand side of the screen), then click the Actions button at the top of the tree structure and select Create root Domain.
When creating a domain, you must provide the following information:
- Domain name: Enter a clear and meaningful name.
- Comments (optional): Add a description if required. This comment will be displayed at the top of the domain page.
- Language: Select the learning language. This setting determines the language of the environment displayed to users when they sign in to their learning portal.
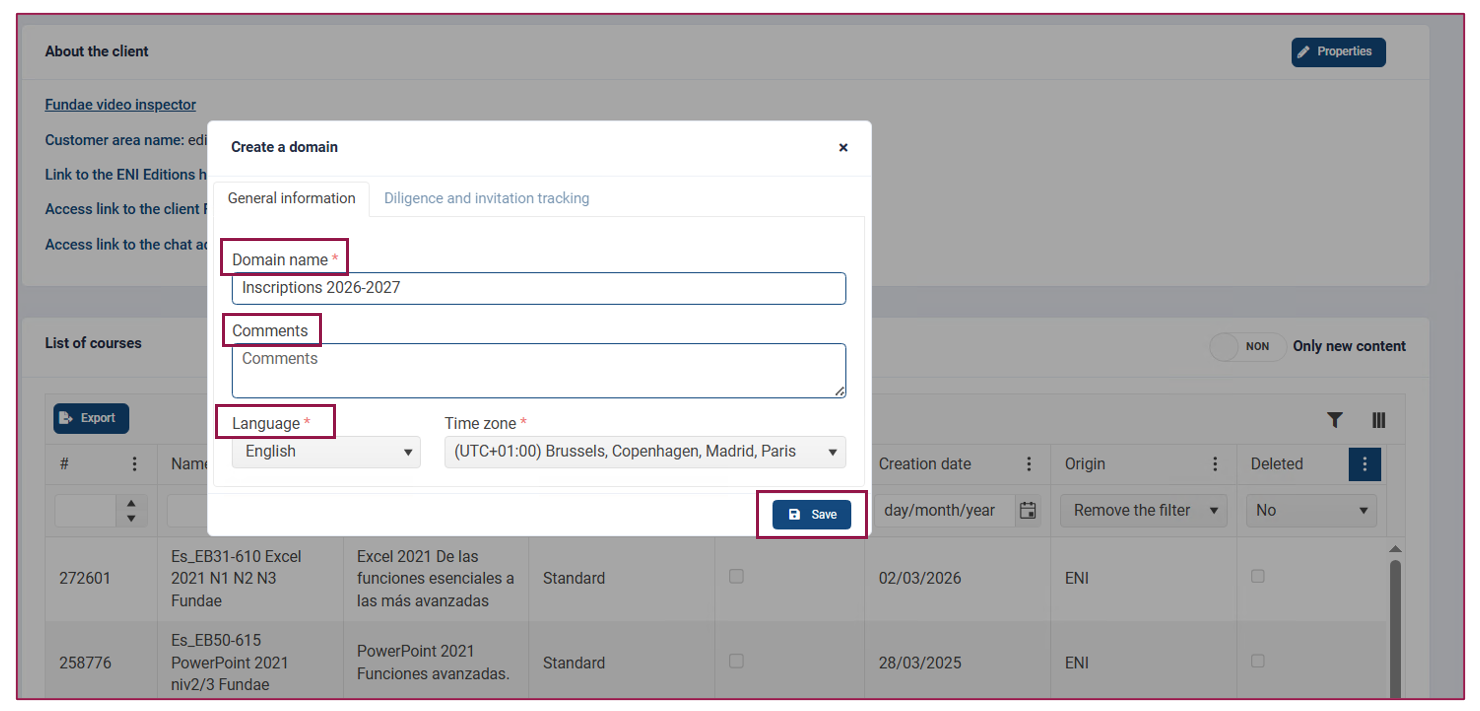
Click Save. A notification appears in the upper-right corner of the screen:
- A green notification indicates that the operation was completed successfully.
- A red notification indicates that the operation failed or could not be validated.

You can click the notification to dismiss it immediately. Close the creation window by clicking the X. The new domain is displayed in the tree structure with the settings you defined. You can then create groups within it.
Creating a Child domain
You can also create child domains to further refine the organisation of your training portal.
However, this feature is intended for specific use cases and is not required in most situations.
A child domain is always attached to a parent domain. It inherits the settings defined for that parent domain unless they are explicitly overridden.
To create a child domain, select the parent domain in the tree structure, then click the Actions button and choose Create a child domain.
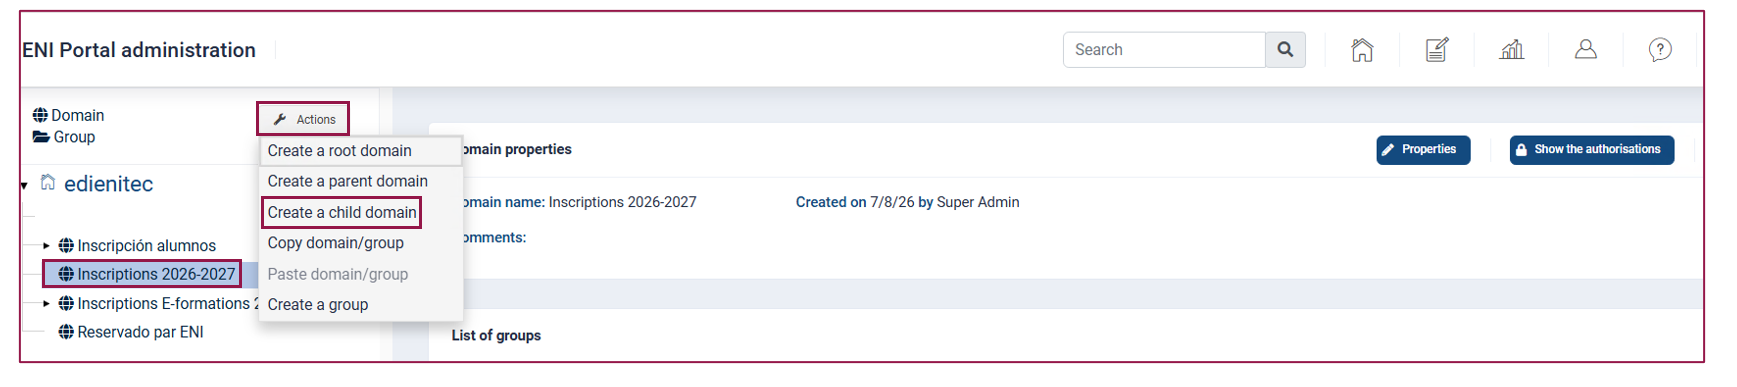
The information required is the same as when creating a domain:
- Domain name: Enter a clear and meaningful name.
- Comments (optional): Add a description if required.
- Language: Select the learning language.
Click Save. The child domain is then displayed beneath its parent domain in the tree structure.

You can click the notification to dismiss it immediately. Close the creation window by clicking the X. The new domain is displayed in the tree structure with the settings you defined. You can then create groups within it.
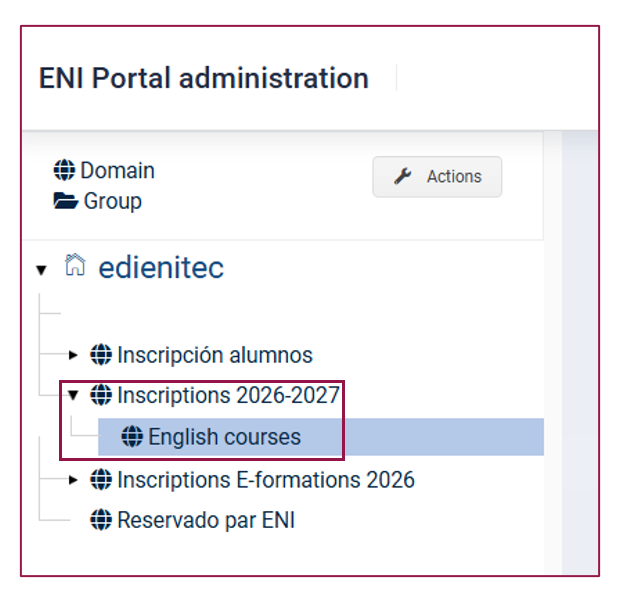
Creating a Group
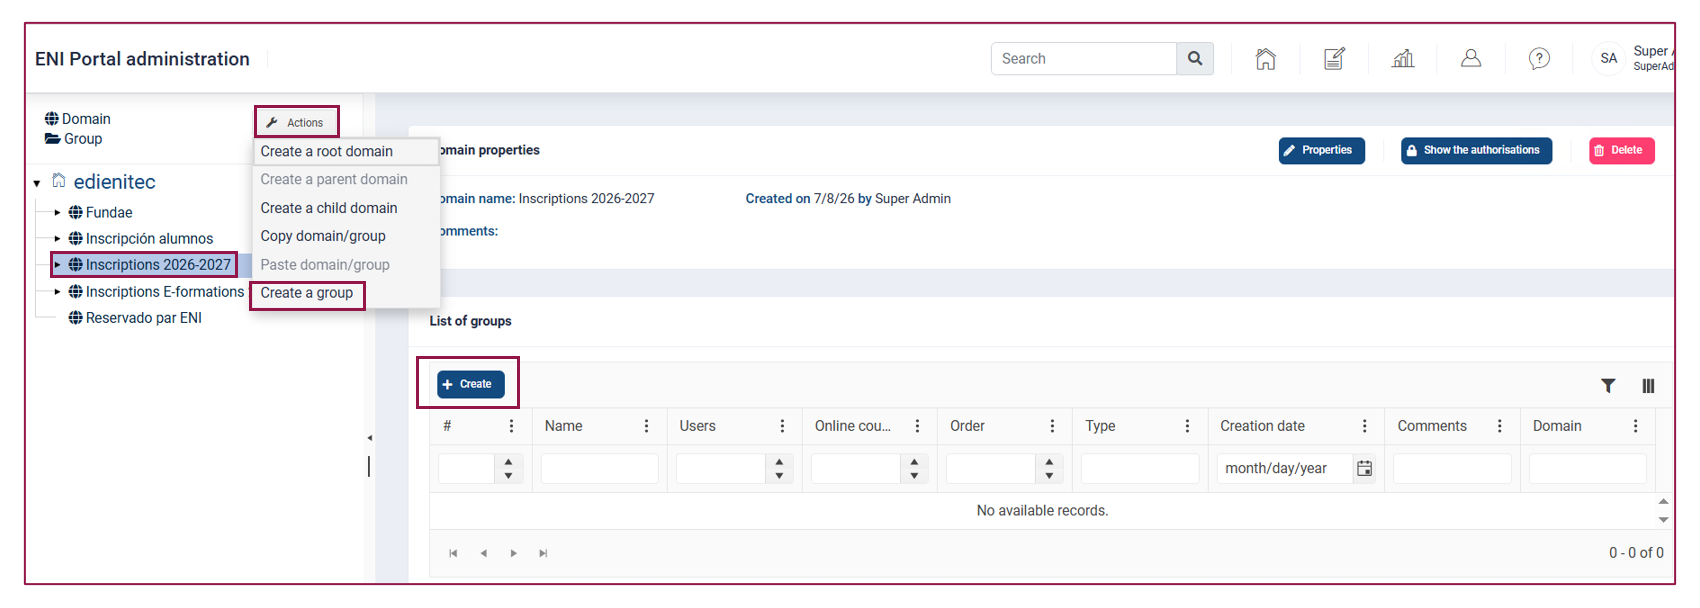
In the navigation pane, select the domain in which you want to create the group.
Start creating the group using one of the following methods:
- Click the Create button in the List of groups located in the central pane.
- Or click the Actions button in the navigation pane, then select Create a group.
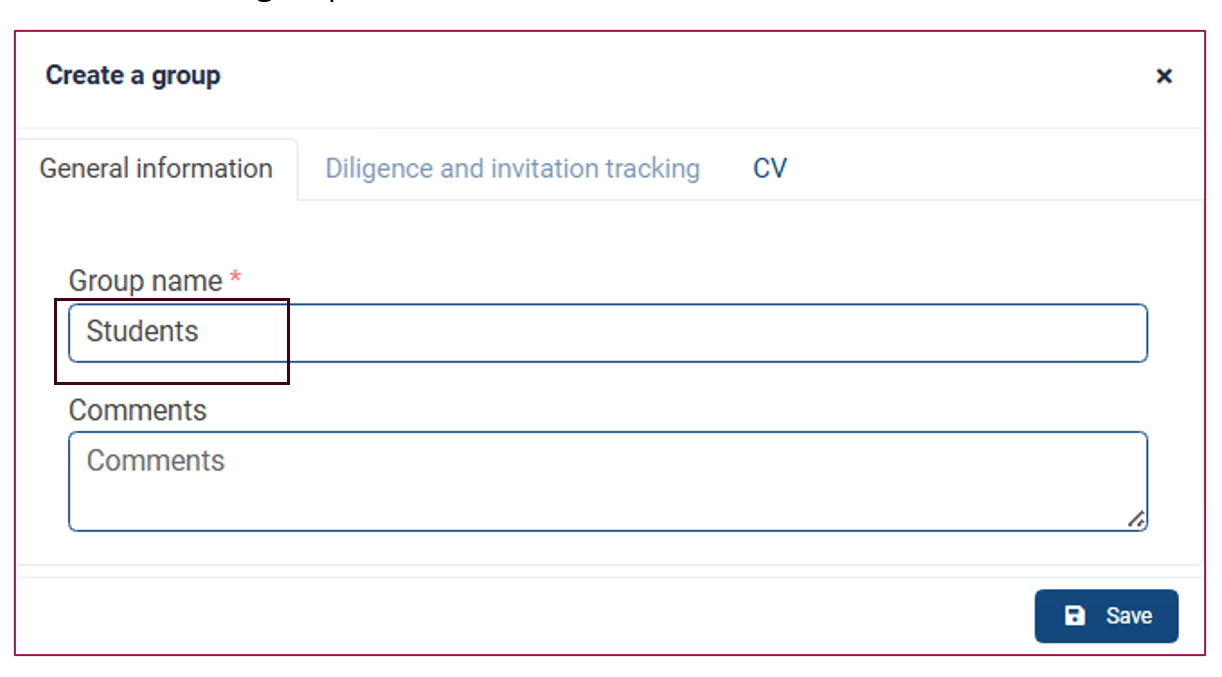
In the window that opens, complete the Group name field. You can also add information in the Comments field if required.
Click Save to create the group.
After a group is created (or modified), a notification is temporarily displayed in the upper-right corner of the screen.
- A green notification indicates that the operation was completed successfully.
- A red notification indicates that the operation failed or could not be validated.

You can click the notification to dismiss it immediately.
Close the creation window by clicking the X. The new group is now displayed in the liste of Groups.